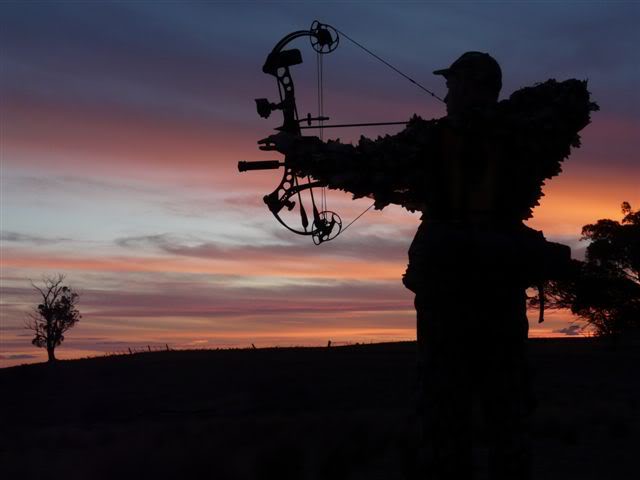
Another week at work. One which you know will finish sometime, but it seems intent on draining every last bit of inspiration out of you.
5:29pm couldn’t have come sooner, as I aggressively turn the key to shut up for the day. Now I was free.
I'd taken a shower, put on my faded 'bluey' and taken a Carlton Draught 'tinnie' outside to sit in the glorious sun I'd missed out on all day, before my slumber-like state was given a shake. Perhaps a vibrate is more accurate. Someone was ringing my mobile.
A quick glance at the screen and the name scrolling tiny and bright brought about an instant realisation. I was going bowhunting tomorrow!
The call was only short, it only needed to be. With a 'yep' and a 'let’s leave early … 3.30 … rightyo' things were in place. The next sip of amber tasted that little bit sweeter, as images of the country that was to greet me the following morning so vividly took over every space within my head.

Now I could cut to the following days hunting, the game seen, the shots, and the day’s hard earned rewards, but for me, and I am sure many other bowhunter's out there, even the little things, not even necessarily while the camo is on, make bowhunting such a dear thing to me.
Just about everyone who is aware of my passion for bowhunting knows how much I love/live it. I get a weekly ‘guilt trip’ from my girlfriend about ‘how nothing matters except when it’s got to do with bowhunting’, and my usual response is like what you would hear when a politician is getting grilled about the latest tax rise – avoid at all costs!
I think a major part of my enjoyment “off the field”, so to speak with bowhunting, is knowing my gear.
Like all outdoors enthusiasts, the gear I go hunting with is about as important to me as a flush toilet is to a Mexican restaurant. The little things all add up to form a complete ‘set’ that is kept in top condition at all times just in case a spur of the moment hunt comes along. I take a fair bit of pride in not only using my bowhunting gear, but also understanding how the equipment works, its finer details, and most importantly how it all comes together to work at its optimum.
I recall as a young boy making bows n’ arrows with my Uncle Brian. An engineer and scale modeller by trade, he was one of those people that could make just about anything out of junk. He’d horde this and that, stuff that most people would consider ‘throw away’, and store it in his sheds, as well as file it away in his amazing mental catalogue. So when my hunting craze began, Brian began to perfect his skills as a ‘bush mechanic’ style bowyer and arrow smith.
The finishing touches to my next archery set would always be the cutting and inserting of the freshly picked gum leaf fletches. With a few twists of fine wire to tighten the nock end of the arrow, I would go find my spot to sit in the neighbouring bushland, awaiting anything to dare stick its nose out.
Fittingly, a few years later, when I was perhaps 10 years old, I took my first game with the bow, and the arrow that struck that little bunny at the base of the ear was made by Brian. By then I’d progressed from saplings and sticks to fibreglass and dowel, but even now the same methods apply. Fittingly, although Brian isn’t around anymore, I reckon my hands are looking more and more like the super-glue dried, scalpel-scarred ones that used to guide me as a boy.
These early memories have no doubt spurned my interest into the making of, and workings, of the equipment I hunt with. Knowing my bowhunting gear inside-out is a fulfilling pastime that I involve myself in almost daily.
Learn it, live it, love it…
Even though it is mid-week and you aren’t closing in on that 6x6 Red stag, it is still simply satisfying to tinker away at getting that rest positioned perfectly, then to see your arrows seemingly be laser guided to the target with perfect flight. It is in my mind, imperative that you have a solid understanding of your bow and arrow’s workings, and the ability to get all the components working well, keep them performing, and fix them if needs be. If you can confidently come to full draw time and time again knowing that all you need to worry about is ‘that spot behind the shoulder’, then your time and effort back at home have already allowed you to make that shot count.
Without attempting to re-write the many tuning manuals and bow technical books, I will touch on a couple of issues that many bowhunters seem to have with their shooting equipment set-up. Some of the issues I will touch upon are not necessarily the most discussed either, and aspects of these issues are also seemingly only minor in importance, though I have found them to be invaluable to consistent performance of my gear.
I should at this point highlight the fact that I am in no way implying that my ways and thoughts are the ‘be all and end all’ of bow tuning or shooting, they are merely techniques that I have soaked up throughout my time shooting bows. Much of my knowledge comes from learning and listening to others and reading a wide variety of literature on the subject, but I believe that I have learnt the most through trial and error.
I am not a ‘qualified’ coach, I simply shoot to hunt, and love simply shooting. I thoroughly enjoy using both my ever present recurve, as well as my stealthy compound. Both bowhunting styles benefit greatly from what I will discus below.
If you take anything at all from reading this, I implore you to try things out for yourself. I happen to learn best by doing, as most of us do, so grab your allen key set and have a go!
Broadhead alignment and arrow spinning…
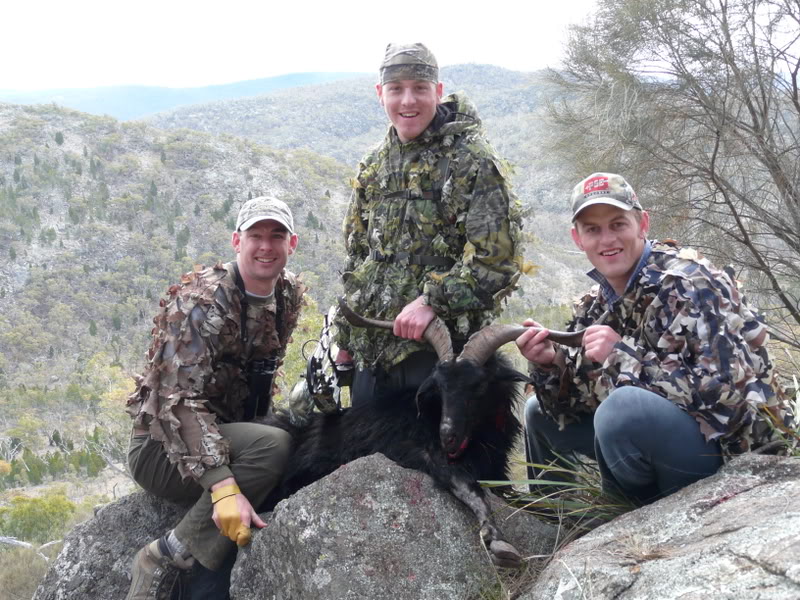
‘Good yeah… you hit him good?’ I whispered nervously to my best mate Kayne. He’d just shot at only his third medium sized game with the bow, a decent billy goat, and I was just as keen to see the ‘stinker’ down and out as Kayne was.
‘I’m not sure… I think so, but did you see that arrow fly? it went like a snake!’
We then both knew that we might have some serious work on our hands to secure his best trophy so far…
Kayne can shoot, we even spent a couple of hours solid shooting the day before and his arrows were flying like darts and hitting the 3D deer really well. He had made the effort to shoot a couple of his broadheads as well, and they shot nicely. But we both look back on the shot at that billy and realise that he used a ‘stray’ broadhead of the same type and weight as his others, just not one that he had checked other than sharpening.
Having a broadhead to arrow connection that can rotate on its axis without any significant wobble is paramount to the accurate shooting of your arrows.
Now most bowhunters know this, and some do make an effort to get their broadhead tipped arrows “spinning up” true. But a great deal of bowhunters don’t spend much time getting this step in their arrow making procedure right, and it is a shame to take a short cut on this important stage.
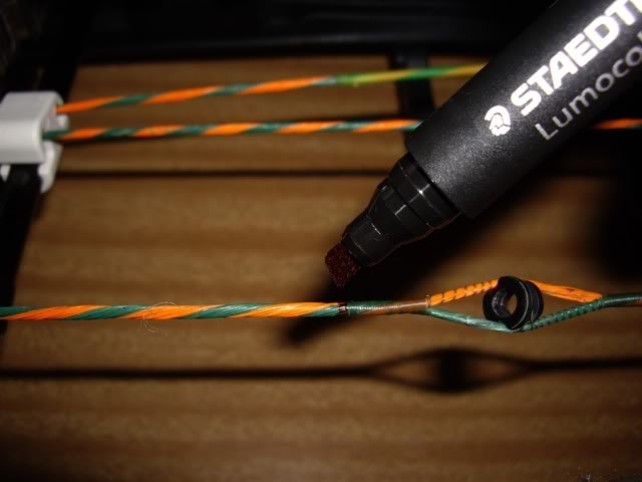
No matter what type of broadhead you choose (glue on or ferrule included / screw in) spending a little time checking how the broadhead is seated onto the front of your hunting shafts will give you an immediate understanding of how well the arrow will fly. I simply attach my broadhead to the front of a selected shaft; put the tip on a flat, solid surface (table, hard bow case etc) and spin the arrow on its point.
You are looking for that arrow to ‘spin like a top’ without any wobble or inconsistency. If you find that there is some wobble, and you are using a screw in model broadhead, then I would firstly unscrew it and see how it spins up on another shaft. You may find that certain heads seem to ‘gel’ (match up) with certain shafts better than others, and so this is a quick fix solution.
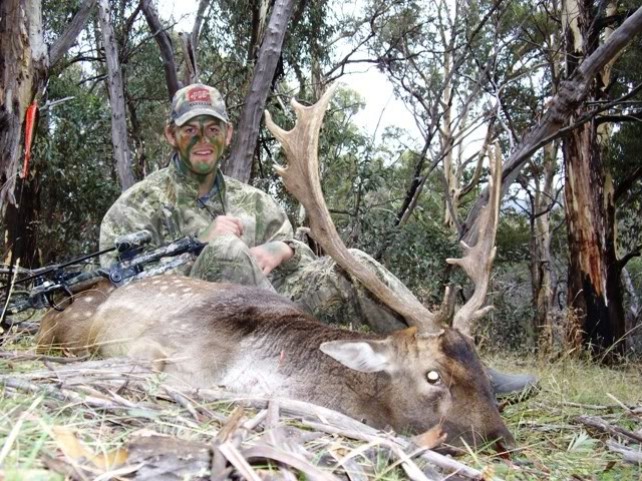
As Kayne Amiet shows, even high dollar ‘top of the line’ broadheads such as this Magnus Snuffer SS need to be ‘spin tested’ on the particular shaft being used to ensure good arrow flight and downrange accuracy.
With glue on style broadheads that require a broadhead adapter to be glued into them so they can function as a screw in point, (or on the end of tapered shafts such as timber) extra emphasis needs to be placed on the ‘spinning up’ process. Not only are you faced with having to get the shaft-to-insert, insert-to-broadhead connections aligned, the insert-to-adapter, adapter-to-glue on broadhead steps are thrown into the mix.
As this style of broadhead is popular in Australia, I feel that sometimes bowhunters are quick to ‘just glue em in’ (relating to the adapters) and inconsistent arrow flight and inaccuracy follows.
Once you have pressed the glue on broadhead’s ferrule down over the epoxy dabbed tapered end of the adapter or shaft, then proceed to spin it on its tip. Ok, it wobbles badly. Begin to twist the broadhead around in small amounts and spin the arrow after each little twist. Getting better? Keep twisting that head until the ‘sweet spot’ is found, then leave to dry.
It seems that some times these connections simply will not allow for a tolerable alignment, and in these few cases put the components in question aside and maybe try them again with a different shaft/adapter/broadhead etc. It’s not worth having a few ‘dodgy’ ones amongst your arrows. Who knows which one you will pull out of the quiver to make that once off shot!
So press play on your favourite bowhunting DVD, mix up some epoxy, and spend some time ‘spinning up’ those broadheads!
Anchor point at full draw…
Have a look at a photo that you have of yourself and a few of your bowhunting mates, what an ugly mob!
No, aside from the bloke on the end looking as though he’s had a few too many ales (yourself), you’ll notice how different you all are. Some tall and thin, some short and beefy, the long necked Rusa hunter, the nuggetty boar killer…
All these guys have different bows, and different ways of shooting them. They all have different draw weights, different draw lengths and different shooting procedures. Aside from the widely discussed “correct and incorrect” anchoring and aiming methods for shooting a bow that those with a far longer history of shooting bows than myself explain in much of the available literature, I will stress the importance of at least acknowledging where your anchor point is.
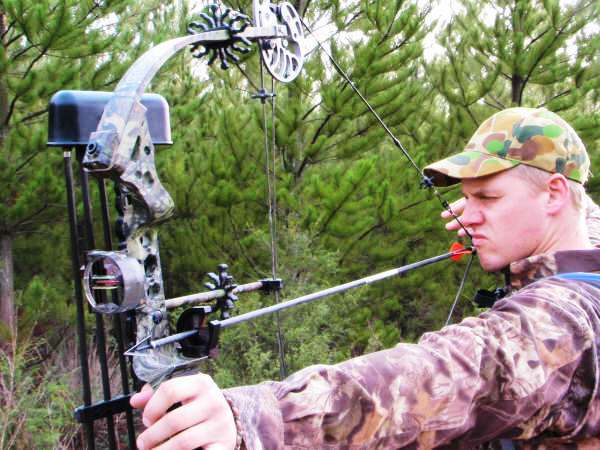
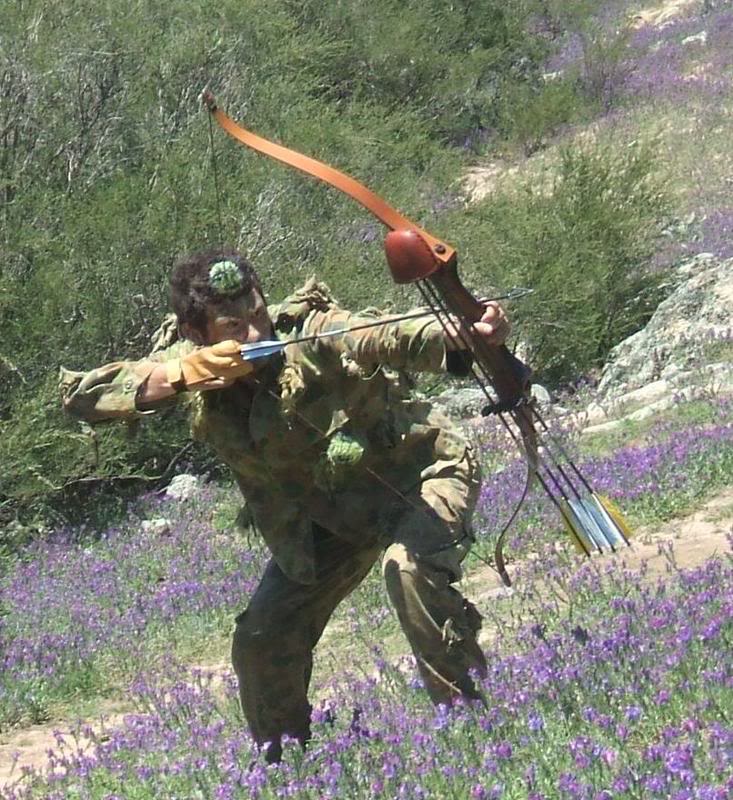
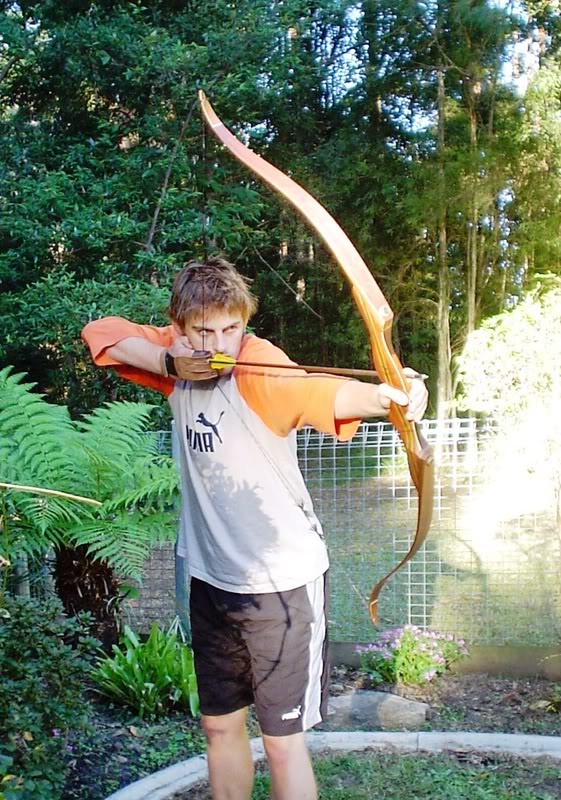
At full draw with either a compound or a traditional type of bow, a consistent feel at a point where the hand that is drawing the bow can pause prior to releasing the string, is essential for accurate shooting.
Only trying different positions of anchor will give you a clear answer to where you will feel comfortable at full draw. For example, I have always felt best drawing back to the corner of my mouth with my recurve bow. When I feel that my middle finger (the finger pulling back the string directly below the arrow) make contact with the right hand corner of my mouth I know I am less than seconds from instinctively releasing the arrow on it’s way.
Alternatively, the anchor point I use when shooting a compound is different altogether. Shooting with a release aid, I find that my release hand's 'top' knuckle sits almost like it was made to, in the hollow under my ear lobe, behind my jaw bone. This anchor point I find is more accurate and helps me align to aim better and most importantly, more consistently than when I used to anchor with my hand aligned with the bottom of my jaw bone. It sits solid and flush, allowing me to put pin to 'spot'.
release.
Obviously a consistent anchor point is critically affected by the gear that is being used and how it is set up, if you are using a release aid, and also your overall shooting form. Again, read about shooting form, watch others shoot, get other bow shooters thoughts and opinions, but above all try drawing back and finding a consistent anchor yourself.
Sighting in over time…
You wake up thinking it’s a Monday and that terrible understanding that you’re back to work hits you. Is there a worse feeling?
But like slipping your hand into those jeans you haven’t worn since last winter and pulling out a $20 note, a sense of joy comes over you as it’s a sunny Sunday morning and you can go shoot your compound bow!
You’ve ‘plonked’ your target butt out at thirty meters and you draw back, get set, align your peep, and that pin moves onto the little dot you know you were drilling the day before.
With a ‘thump’ the arrow buries home. A few more shots later you think nothing of the fact that all your five arrows are grouped three inches to the right of the dot.
Only after another couple of groups you realise that your sights are out. You make the adjustments and away you go, shooting really nicely where you are aiming.
Later in the week one day after work you’re back out taking aim. Twenty arrows along you see that again, you’re slightly off where you’re aiming…
Obviously you cannot shoot perfectly every time you go for a shot, and as a result your aim will not necessarily be the same each session. For this reason the ‘sighting in’ of your compound hunting rig needs to be done over a period of a few shooting sessions, not just one or two. This is even more crucial if the bow, arrows, or certain pieces of your equipment are new to you. Moreover, the longer the distance you are shooting, generally the less precise you can be at setting your pins.
Put basically, you physically have to be able to shoot consistently before your sights will consistently be ‘on the mark’. For this reason take notice of your form when you are ‘sighting in’ and don’t be too hasty in setting your sights and pins. You’ll take too many shots down the track to have spent only an hour or two putting your pins ‘pretty much’ where they should be.
Not quite fully settled into an aiming position I am making sure I come to a consistent anchor. This will lower my release arm, and align me for the shot. Further, long range and steep angle shots are made possible by knowing your sights are properly ‘sighted in’.
Marking settings/wear and tear maintenance…
I recall a good mate of mine hoisting himself eagerly to the next ledge like ‘Incy Wincy’ up the proverbial. However his normal cat like abilities didn’t help him this time as the loose dirt, dried from too many days without rain, gave way. His fall wasn’t too far and fortunately he avoided any injury.
Although it wasn’t that far further up the rocky incline that he noticed his sight was rattling on his compound bow, he simply tightened the sight back up and his hunt, until we got back to camp, was pretty much over as he had no way of knowing where his sight was now pointing...
A bloke by the name of ‘Pego’, a few seasons ago now, made a simple passing comment about how he marks all the settings on his bow with a permanent marker. I have done this with my gear ever since.
This simple act allows really easy and possibly hunt-saving references to the positions of things like the arrow rest, sight, peep, nocking point/D loop. Other spots that I mark on certain bows are the limb bolts (especially when you have them set for use, wound out a turn or two) cam orientation, draw stop position.
Once you are more than happy that your bow is tuned, and your sights are on target, get a marker (I use a craft type paint pen) and mark all the accessories and gear that you have worked so hard to get ‘just so’. If anything moves you’ll know straight away, saving time getting your set up right again, and a lot of tears and hair pulling!
Further, simple acts like waxing your bows string, and or cables regularly, will not only keep your bow performing, but also save you money as the materials will simply last a lot longer. Also, occasionally giving your bow a simple ‘once over’, looking for any possible signs of stress or wear, as well as a clean with a damp rag, just makes sense when you consider the hardships your equipment goes through out in the bush.
It all adds up…
The little bits and pieces that you learn along the way really only reveal their true value when you can pass them on to someone new to bowhunting. I’ve been very fortunate so far in bowhunting to have met the people who not only inspired me to draw back a bow, but also those who helped me onto the path to be the best bowhunter that I can be. I’ve got a hell of a long way to go, but going by the experiences so far it’s going to be great.
My brother Kegan was cruising along the river ahead of my best mate Kayne and myself, when he pulled up pretty casually. “There’s one coming along towards us hey”, he said in his typically ‘happy-go-lucky’ type of way. (I would have been almost wetting myself by this point already)
See, the cheeky bugger hadn’t shot anything bigger than a bunny with his bow to that point, and here he was just like a seasoned hunter, slowly getting an arrow on the string, he had all the time in the word apparently.
It was only seconds until I turned to see Kayne’s face, with eyes like billiard balls, that I knew Kegan just in front of us wasn’t mucking around, and it was going to happen. I recklessly tried to yank the video camera out from my stubbies, but I could tell that it wasn’t coming out easily in my crouched position, so I let it be, and just turned to soak up the moment.
I recall holding myself back from giving him instructions so that he would be ready for the goat to come into range. I think Kayne behind me was also praying that the ‘newbie’ didn’t freeze and blow the opportunity.
But again, as confident as you like, the brother drew back and anchored solidly. We knew his sights were on the mark as he had spent the last couple of weeks sighting in and practicing for this hunt.
All of a sudden the tell-tale hoof steps of a goat broke the silence of the late afternoon river bed, and a long mottled ‘goatee’ beard caught our attention merely ten meters above and to our left.
The well aligned Blackstump broadhead tipped arrow clattered on the rocks and into the blackberry bush so quickly that I was uncertain what had happened, but ever hopeful I blurted, “You smoked him!”
A few minutes later it was handshakes all round, and the camera’s got to work.
The time and effort spent at home setting your gear up correctly and making your technique consistent is well worth it and in my mind vital to fully maximising your potential out in the bush.